Showing posts with label coffee. Show all posts

Wednesday, January 9, 2013

Coffee Cup Sleeve 2.1 & Fabric Gift Bag

I've been excited to share some of the things I've been making and am glad to finally have the opportunity to do so! It was recently one of my friend's birthday, so I bought her some items and made some. I was going to make her a makeup bag, but I just didn't have enough time to try something new. We were going to meet up at a coffee shop so it was only fitting that I make her one of my favorite things to make, a cup sleeve. To make this, you can follow my tutorial here: Coffee Cup Sleeve 2.0. The only difference is that I took some of the "slant" off the ends from my pattern. It won't be necessary to do that if you grab a coffee sleeve from a coffee shop beforehand (I didn't have one on hand). I also made an impromptu gift bag. :) With gift bags being typically at least $0.50 to purchase, making your own is much cheaper, takes little time, customizable, and can be reused for other things. I didn't take any procedural pictures because I was in a rush and figured it was easy enough to just provide a quick explanation. When the next opportunity arises, I'll provide a more in-depth tutorial in case anyone needs it or make a better gift bag. :)


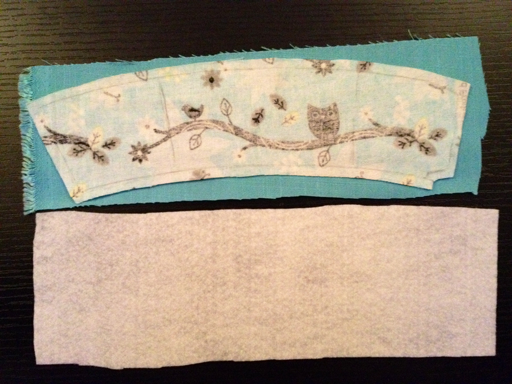
  • Just place your items on the fabric to figure out how big you need to cut it, include room for the bulk of the items and 1/4" seam allowances. Cut on the fold so that you have one long piece.
  • Fold right sides together and sew the two sides and leave an opening on top. Hem the opening.
  • Cut a piece of printed scrapbook paper or similar and punch a hole in it for the gift tag.
  • Cut two pieces of cording, ribbon, yarn, or similar to use as handles. Cut lengths in appropriate proportions to the size of your bag.
  • Pull one of the handle pieces through the gift tag and sew a handle piece to the insides of the opening. Sew on the hem line. Turn right side out and voila!


Pin It Now!

Sunday, December 2, 2012

Coffee Cup Sleeve 2.0

Update:


A couple days ago I posted a tutorial for a Coffee Cup Sleeve. I just finished another sleeve with a sleeker design. This design requires a bit more precision and took me longer to complete, but I think that in the end it was worth it. Since I have a few of these to make, I am going to keep playing around with different construction design. Stay tuned for my velcro version!

Materials:
  • 4x12" front fabric
  • 4x12" back fabric (use canvas, drapery, or other heavy weight fabric if not using a third insulating layer or interfacing)
  • 4x12" insulating material or interfacing (optional, I did not use)
  • 1 button (medium to large)
  • 1 hair elastic
  • marking tool
  • bobby pins
  • needle/thread for hand-sewing (for the button and elastic)

Costs:
  • front fabric ~ $1.25/yd, Joann
  • back fabric ~ $1/yd, Joann
  • button ~ $0.50/pk, Joann

Instructions:


  • Trace a coffee cup sleeve onto the wrong side of your back fabric.  I accidentally threw away my Starbucks sleeve, so I just traced the sleeve I already made.
  • If you want to just draw the shape yourself, then place points in the same positions as the diagram and draw your curves accordingly
  • Cut out the back and trace it onto the wrong side of the the front fabric and cut.


  • Starting with the back fabric (right side down), carefully fold in 1/4" all around and iron.
  • Place the front fabric (right sight down) over the back fabric, fold in the sides and iron. Use the back fabric as a guide to make sure that the edges of both pieces meet as closely as possible.
  • If you are adding interfacing or other material in the middle, then trace the front over the material. Cut slightly inside the lines so that the piece is ever so slightly smaller than the front fabric. Place it inside the folds of front fabric. Iron, if necessary.


  • Take the elastic and sew the middle together. You want a loop just big enough to fit your button. Cut off the excess.
  • Place pieces in this order: back-right side down, elastic on one end, and front-right side up. Pin the end with the elastic together and also the longest side (you want the buttom unpinned so you can sew the button on with hidden stitches).
  • Bring the ends together (with some overlap) and mark where you want the button to be. Sew the button onto the front fabric only.
  • Pin the rest of the sides and top stitch all around. I double stitched the elastic end for more security and did the same on the other side to match.

Pin It Now!

Friday, November 30, 2012

Coffee Cup Sleeve

Update:
Coffee Cup Sleeve 2.0 (improved sleeker design)
Coffee Cup Sleeve 2.1 & Fabric Gift Bag


I loves owls and I was so happy when I found such a cute owl flannel remnant at Joann's. I had this exact project in mind when I saw this fabric. Owls, Starbucks, being green... perfect! I had seen it by the bolt and figured I'd check the remnants to see if it was there and it must have been my lucky day! On a side note, I LOVE remnants. I usually only need a small amount of fabric for this and that, so why not get the extra discount for remnants to get the same amount of material I would have gotten anyway?

It's on the bulky side, but I kind of liked that because of the flannel material. Cozy and cushy. I'll be making a different one with less weight as an alternative sleeve.

Materials:
  • 3.5x11" front fabric
  • 3.5x11" back fabric
  • 3.5x11" felt, interfacing, batting, or omit if your fabrics are thick
  • 2 buttons
  • 1 hair elastic
  • marking tool
  • bobby pin
  • a chop stick or similar (for poking corners of the fabric out when turned right side out)
  • needle/thread for hand-sewing

Costs:
  • front fabric ~ $0.50/yd, Joann
  • back fabric ~ $1.25/yd, Joann
  • buttons ~ $1/300pk, Joann
  • felt ~ $0.50/yd, Joann

Instructions:

I used a sleeve from Starbucks as the template.  Be sure to have an idea of image placement if you are using a printed fabric that has a wide image design like mine.


  • Trace the cardboard sleeve onto the wrong side of the front fabric and added a second outline with a 1/4" seam allowance.
  • Fold the sleeve in where the bents were and marked the sides on the fabric.  This helps to make sure that image will be centered properly.

  • Cut out the pattern and lay it over the back fabric.  To make things easier, cut a rectangular just big enough to fit the pattern.
  • Cut a piece of felt the same size, if necessary.
  • Layer the fabric in this order: felt (if using), back-right side up, front-right side down.
  • Sew along the inner outline, leaving one end open.
  • Trim the up the seam allowance and snip off the corners.
  • Turn it inside out (this where the chop stick helps) and iron.
  • Cut the elastic band in half and sewed the ends together by hand.
  • Poke through one end of the band (pierce the actual elastic) and into the other end.  Then, I wrap the thread tightly around both ends 2-3 times, sewed into the ends, and repeated at least 4 times.

Now, it's time to close up the sleeve.
  • Fold the layers of fabric inwards for a 1/4" seam and pin the elastics into the layers.
  • Top stitch all around for a clean finish.
  • Bring the ends together and mark the position of the buttons, sew the buttons on and your done!

Pin It Now!