Showing posts with label recipes. Show all posts

Tuesday, May 21, 2013

Chinese Egg Custard Dessert


I've loved all different kinds of custards ever since I was little. When I was a child in Vietnam, my grandpa would always give me a piggyback ride to my English school and never failed to treat me to a custard sandwich along the way. Oh, how I miss those days! Life was simple and full of piggyback rides and sweets. I've never seen sandwiches like that in the U.S. When we came to U.S., my grandma started making me steamed egg custards when she cooked rice and I fell in love it that too. I got a steamer a couple weeks ago and I've been hooked on steamed egg custards ever since (Walmart's Mainstay 8 qt multi-purpose pot with a large and small steaming basket for $25, not available online). Just subtly sweet and so smooth. It's also so simple to make! Here's how...


Ingredients:
  • 1.25 C of milk
  • 3.5 tbs sugar (My family back in Vietnam uses a little bit of condensed milk instead, but I didn't have any around.)
  • 2 eggs

Instructions:

  • Heat the milk and sugar in a pot and stir constantly.
  • Be sure that all the sugar has dissolved and remove from heat to cool.

  • Once the milk has cooled, start boiling the water for the steamer.
  • Break the eggs in a small bowl and beat well.
  • Slowly pour the milk into the eggs and mix as you do so.

If you don't care about the presentation, start steaming per steps below.

I prefer my custard without the foam on top AND
without misc bits of egg that didn't mix well into milk (see in the image above)...
...so, I pour the egg/milk mixture back into the pot. Then, I pour it into the small bowl through a mesh strainer.
Steaming:
  • Place the bowl into the steamer basket when the water is ready.
  • Cover it with a plate and steam at medium heat for about 15 mins.
  • The longer it cooks, the firmer and less smooth it gets.

I got distracted and steamed it for a couple minutes longer than I should have.
It was still pretty smooth, but just firmer than I prefer. Still loved it though!

Pin It Now!

Make Garlic Herb Croutons In Just Minutes

I've been guilty of pigging out and over snacking and just eating bad in general. One thing that I've been trying to eat more of recently is salad. I ended up running out of croutons last time and was too lazy to go to the store, so I decided to try and make my own. I was afraid that it wouldn't turn out right, because I didn't have bread that had been sitting out. I found that this isn't necessary at all. Here's how to make croutons in a pinch.


Ingredients:
  • 2 pieces of toast, cut into cubes
  • 3 tbs butter, melted
  • 1 tbs garlic
  • 1 tbs Italian herbs
  • 1 tsp salt
  • 1 tsp pepper

Instructions:

  • Mix all the spices into the melt butter.
  • Put the mixture and bread into a ziplock bag and shake well.
  • Let the mixture sit aside for a couple of minutes, so the bread can absorb the flavor.

  • Toast the bread on low heat until crispy. Alternatively, you could toast in the oven at 350 degrees for a couple of minutes. (I ended reheating in the oven since I ate it much later in the evening.)

I ended up eating a chicken salad with homemade Italian dressing, feta, and cranberries.
I also baked a portabello mushroom stuffed with sauteed Canjun sausage, onions, and peppers. Mmmmmm I heart mushrooms!

Pin It Now!

Saturday, May 11, 2013

Seafood and Veggie Noodle Soup


Yesterday I made a really easy and healthy noodle soup with seafood and veggies. I was craving some sort of hot seafood noodle soup, so I just threw together somethings that I thought I might like. It turned out pretty yummy, so I thought I'd share with it you. Prep time was minimal and it only took about 5 minutes to cook. I made about 3 servings with my ingredients.

Ingredients:

  • 6 C of chicken broth
  • 1/2 C of imitation or real crab meat (cooked)
  • 1/2 lb of shrimp (uncooked)
  • 3-4 big slices of ginger
  • 1/2 C snow peas
  • 1/2 C carrots
  • 1/2 bunch of chopped scallions
  • 2-3 bunches of chinese broccoli, leaves seperated (I also chopped up the stems)
  • 3-4 servings of noodles of your choice (yellow or vermicelli)
  • 1 tsp black pepper
  • soy sauce to taste

*The picture depicts twice the amount of scallions than what I listed. I get very scallion happy.

Instructions:

  • Start cooking your noodles per instructions on the package. At the same time, heat the chicken broth until it comes to a boil.
  • When the noodles are done, put aside to drain. When the chicken broth reaches a boil, add the shrimp and let cook until the shrimp is almost done (~2 mins, depends on size of the shrimp).
  • Add the crab, carrots, and snow peas. Cook for 2 mins and remove from the heat.
  • Remove the ginger from the soup and add the scallions, chinese broccoli, and soy sauce to taste. Let sit for 1-2 minutes, then serve with the noodles.

Pin It Now!

Thursday, April 4, 2013

Green Tea Latte

One of my biggest guilty pleasures is Starbucks. I know there are better coffeehouses around and that they are overpriced for average tasting coffee… but like all the other Starbucks lovers, I just can't get enough! I've been obsessed with their green tea latte since one of my friends turned me onto it a couple of years ago. I usually order a cold green tea latte with soy, no syrup and no ice. I got tired of dropping so much money each week at Starbucks, so I started making it at home. You can use my recipe as a base and adjust the sweetness to your liking (I prefer mildly sweet).

What you need to know:

You will need to purchase green tea in a powder form called matcha. Matcha is green tea, but not all green tea is matcha. Each brand of matcha will taste slightly different depending on quality/grade/purity. The matcha mix from Starbucks already has sugar in it and I don't expect it to be a high quality. The better quality matcha I purchased was from Teavana, but it was too bitter when used in a cold drink and is better served hot. Not to mentioned, it was very expensive (but still comparable to other quality matcha). You get what you pay for, so don't just pick the least expensive one either! I ended up buying this from Amazon: SerendipiTea Matcha Culinary Grade, Organic Green Tea, 4-Ounce Box. It's moderately priced and makes pretty delicious lattes. I haven't tried it in baking yet. A little bit of matcha goes a long way.

You will also need to invest in a chasen, which is a ~3" bamboo whisk that is used specifically for preparing matcha. Matcha gets clumpy and the chasen breaks it up and mixes it nicely (my drinks at Starbucks are always clumpy, but not at home!). I got mine from Amazon here: Chasen (Green Tea Whisk). Teavana sells the same product, but it was slightly cheaper on Amazon if you qualify for free shipping.

This green tea latte takes just seconds with whip up and here's how:

  • For every 1 cup of soy milk, you will need 1 tsp matcha and 1 tsp sugar.
  • Start with the dry ingredients in a small bowl. Adding a few spoons of soy milk to the mixture and mix with the chasen (act as if you are diluting corn starch). Once the dry ingredients are mixed in, pour it into your glass.
  • Add the rest of your soy milk and give it a stir.

Enjoy your latte at home or make it go!


Pin It Now!

Sunday, March 31, 2013

Easter: Cupcakes and Bacon Deviled Eggs

Happy Easter! I hope everyone is having a lovely weekend. I spent the weekend with Mike's family for Easter. It was a great time and lots of great food. Typically one meal here and you are set for the rest of the day. My contributions included cupcakes and deviled eggs. :)

~CUPCAKES~


I used Betty Crocker's white cupcake mix. I think it's pretty tasty for box cupcakes. For the first variation, I used Nutella (works amazing as icing) topped with coconut M&Ms. Doesn't it look like nests of bird eggs? For the second, I made my own strawberry whipped butter icing (will post a recipe when I perfect it) and made an attempt to top the cupcakes with roses. I think I did alright on my first try. Here is a great site that I used to help me learn a little about how to frost cupcakes: Cupcake Basics - How to Frost Cupcakes.

~BACON DEVILED EGGS~

The first time I ever made bacon deviled eggs for Mike and a friend during an impromptu BBQ, it blew their minds. Anytime we talk about appetizer or bacon in general, Mike loves to brag about this moment. It's so sweet and endearing and might even make me blush a little. :) Here's how I make it:

Ingredients:
  • 12 eggs
  • 1/2 C of mayonaisse (I like the kind with Olive oil)
  • 1 TB of mustard
  • 5 pieces of bacon, cooked and crumbled
  • 1 TB paprika, extra for dusting over completed eggs

Instructions:
  • The first thing that you need to do tape up a carton of eggs and turn the carton on the sides the night before. The reason I do this is so that the egg yolk will settle in the center of the egg for a better presentation. You won't run the risk of part of the wall being too thin and the white breaking as you scoop the yolk.
  • Place the eggs in a large pot and pour enough cold water in to just cover the eggs. Bring to a boil, remove from heat and cover for 12-14 minutes. Remove eggs and put in a bowl of cold water to cool.

  • Scoop the yolk into a large bowl and mash it with the mayo, mustard, and paprika with a potato masher. Mix in the bacon.
  • Put the mixture in a ziplock bag, cut off a corner, and pipe it into the shell.

  • Dust some paprika over them, garnish, and you will have yourself some fine deviled eggs which are sure to impress. This is another example that goes to show that bacon makes everything better.

Pin It Now!

Tuesday, January 1, 2013

Cuc's Special Lasagna

After experimenting with lasagna after all these years, I think I've finally come up with a solid recipe. It was so hefty that I had to weigh it. After it finished cooking, it came in at 11.6 lbs. I don't know what's typical, but to me this seemed pretty heavy! I served this for the BF and a friend and they loved it. We had this with garlic bread, salad, and some wine. :)


Ingredients:

  • 1 lb Italian sausage, hot or mild
  • 1/2 lb ground beef
  • 1 medium onion, diced
  • 1 medium zucchini, sliced
  • 1 C baby portabella mushrooms, sliced
  • 1 (8 oz) bag of mozzarella
  • 1 C grated parmesan
  • 1 (24 oz) container of cottage cheese
  • 2 eggs, beaten
  • 2 (24 oz) jars of pasta sauce
  • 1 tbsp Italian seasoning
  • 1 tbsp olive oil
  • 2 tbsp minced garlic
  • 9 lasagna noodles (the kind that you need to cook first)
  • salt and pepper to taste
  • red pepper flakes (optional)

Instructions:
  • Grease the sides of a 13x9" baking pan with a little of the olive oil and set aside for later.
  • Start cooking the lasagna noodles per the instructions on the packaging (be sure to add a sprinkle of salt and a few drops of olive oil). While the water is boiling, start on the next steps. When the noodles are done, set aside to drain (the oil will keep them from sticking).
  • Mix together the cottage cheese, 2/3 of the mozzarella, 1/2 of the parmesan, and the eggs. Set aside.

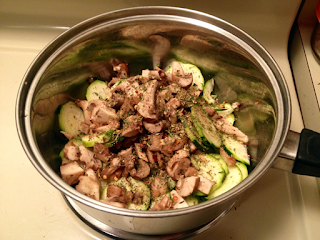
  • Heat the oil at medium heat in a small skillet or pot (save just enough to cook the onions later). Toss in the zucchini, mushrooms, italian seasoning (save a small amount to sprinkle on top of the lasagna later), and a sprinkle of pepper and salt.
  • Cook until the veggies are tender and set aside. You can start on the next steps while this is cooking.


  • Preheat the oven to 350 degrees.
  • Heat the remaining oil at medium heat in a larger skillet or pot. Toss in the onions and garlic; cook until translucent.
  • Add the italian sausage and beef. Break up the meat as you cook; cook until brown.
  • Toss in the veggies and cook for a minute. Spoon out some of the fat at this point.
  • Add in 1 1/2 jars of sauce and heat to a boil.


  • Spread the remaining 1/2 jar of pasta sauce onto the bottom of the baking pan, then layer evenly in this order: 3 noodles, 1/3 of the cheese mixture, and 1/3 of the meat. Repeat twice. Top with the rest of the mozzarella and parmesan. Sprinkle the rest of the Italian seasoning on top.
  • Cover with foil and cook for about 40 minutes. Remove the foil and cook for another 10 minutes uncovered.
  • Let it cool for a few minutes and you are ready to serve!

Pin It Now!

Tuesday, December 18, 2012

Chocolate Mint Cookies

I love cooking meals, but I'm not much a dessert person or baker. I can make fancy cheesecakes, but my cookies always turn out burnt or flat. I made a large batch of chocolate mint cookies that I think was probably my best batch of cookies ever. The outside was slightly crispy, but the inside was so soft. It could also be that I finally have good cookie sheets. I got these Calphalon cookie sheets from Target. They work so well and they are huge, so they fit a bunch of cookies. I was able to make 25 per sheet for smaller-medium size cookies.


I made a bunch of cookies as a way of saying thanks to the neighbors for being sooooo nice and patient while Winston is getting crate trained. I got the recipe from Allrecipes.com, Chocolate Mint Cookies I. I pretty much followed the recipe to the T, except that I used only 1 cup of brown sugar. I have been stuffing my face all day with the leftover cookies. I hope you enjoy them as much as I do!


Ingredients:
  • 3/4 C butter
  • 1 C packed brown sugar
  • 2 tbsp water
  • 2 C semisweet chocolate chips
  • 2 eggs
  • 2 1/2 C all-purpose flour
  • 1 1/4 tsp baking soda
  • 1/2 tsp salt
  • 1 package of Andes mint chocolate

Instructions:
  • In a large pan over low heat, cook butter, sugar and water until butter is melted. Add chocolate chips and stir until partially melted. Remove from heat and continue to stir until chocolate is completely melted. Pour into a large bowl (or your mixer bowl, if using a stand) and let stand 10 minutes to cool off slightly.
  • At high speed, beat in eggs, one at a time into chocolate mixture. Reduce speed to low and add dry ingredients, beating until blended. Chill dough about 1 hour. Prepare the dry ingredients while it is chilling.


  • Roll dough into balls and place on ungreased cookie sheet about 2 inches apart (I did 1-in balls and that yield 56 cookies). Bake 8-10 minutes. While cookies are baking unwrap mints and divide each in half (1 pkg of Andes has exactly 56 halves!).

  • When cookies are brought out of the oven, put 1/2 mint on top of each cookie. The mint may slide off, so watch for this. Swirl the chocolate around when melted. Let the frosting harden before storing away.

Pin It Now!

Monday, December 17, 2012

Beef Stroganoff

This dish is one of my favorites. It's a bit heavy so it's not frequently made, but every now and then is OK ;) This recipe is adopted from one I found on Allrecipes.com: Beef Stroganoff III.


Ingredients:
  • 1 lb stew meat
  • 1/2 tsp salt
  • 1/2 tsp black pepper
  • 2 tbsp mince garlic
  • 1 medium diced onion
  • 4 tbsp flour
  • 1 tbsp olive oil
  • 1 (10.5 oz) can of condensed beef broth
  • 1 tsp mustard
  • 1 C sliced baby portabella mushrooms
  • 1/3 C sour cream
  • 2 tbsp Worcestershire sauce
  • 6 C uncooked egg noodles
  • 1/2 bottle of red wine
  • Additional salt and pepper to taste

Instructions:
  • Put the meat in a bowl and pour just enough wine to cover. Leave in the fridge for 1 hr.
  • Remove the meat from the fridge. Using a slotted spoon, add the meat to a large skillet. Add salt, pepper, and garlic and quickly brown the meat.
  • Once the meat is browned, push it to one side of the skillet and shift that side off the heat, if possible. Add the onions and cook until soft. Then, push over with the meat.
  • Tip the skillet so that the meat juices drop to the empty side of the skillet. Add the flour and stir well.
  • Add the broth, bring to a boil, and stir constantly. Lower the heat, add the mustard and Worcestershire sauce and simmer covered until the meat is tender (~ 1 hr).
  • About 45 mins in, cook the egg noodles per instructions on the packaging. Also start to cook the mushroom in a small skillet with oil. Add a dash of salt and pepper and cook until tender. Add to the skillet with the meat.
  • 5 mins before serving, add the sour cream. Add salt and pepper to taste.

Pin It Now!

Friday, December 7, 2012

Ginger Chicken and Stir-Fried Garlic Green Beans

Today I made ginger chicken again. I made it for the first time a couple of weeks ago from a recipe that I found on PBS Foods and really enjoyed it. I couldn't wait to make it again. If you like ginger and a clean tasting meal, then give this a recipe try: Indulge in Sweet and Savory Ginger Chicken. I paired it with some crisp garlic stir-fried green beans.


*Snapshot from PBS Food

  • I added a dash of black pepper, chili powder, and a spoonful of hot chili oil while cooking. Give that a try if you like spicy.
  • I used about 1.5 lb of chicken breast and doubled the rest of the ingredients. Do this if you like sauces and want a slightly more flavorful taste.
  • I did not use oil during cooking.
  • I like to use longer cut pieces of scallions during cooking and garnish with smaller chopped pieces.


 Instructions:

  • Mix the soy sauce, sake, honey, and ginger. Pour the mixture in a ziplock bag, add cubed chicken, and shake well. Let that sit in the fridge for 30 mins.
  • After you remove the meat from the fridge, cook at medium heat for about 10 mins uncovered. Add your spicy ingredients, if preferred.
  • Lower the heat and cover for about 5 minutes.
  • Uncover, add your longer cut scallions, and cook for 2 minutes.
  • Remove from heat and garnish with smaller cut scallions.

The green beans are super easy to make and I thought it went well with the chicken. I stirred fried about 1 lb of green beans with a small minced onion and about 2 tbs of minced garlic. Add a dash of pepper and salt to taste. I cooked this dish about 8 mins uncovered, 3 mins covered, then 3 mins uncovered. You can change this up to achieve your desired level of crispness (or softness).

Pin It Now!

Saturday, November 17, 2012

Kaeng Hang Lay (Burmese/Thai Pork Belly Curry)

I went to a Thai restaurant called Pok Pok in Portland with a few people this summer.  I was terribly sick during our entire Seattle/Portland trip, so I didn't get a chance to taste much of the food.  Everyone thought the food there was delicious and the favorite was a Burmese/Thai pork belly curry called Kaeng Hang Lay (or Kaeng Hung Leh and other variations).  When we came back from our trip, I decided that I needed to make this based on the rave reviews.  After finding many recipes, I finally decided to go with this one: http://www.austinbushphotography.com/blog/how-to-make-kaeng-hang-lay.html.  This looked the most authentic and the pictures of the old lady making this in the kitchen of her home in Thailand was too perfect.  I've made this twice very recently and this is probably in my top 3 favorite dishes and the BF approves!

Here is a picture of the curry, about an hour into cooking.  I don't have any process pictures right now, but the link provided above has some you can check out.

Spicy, savory, D-E-L-I-S-H!

Ingredients:
*Snapshot from the original poster's blog

  • Make sure you have a good butcher knife to cut through the pork belly skin.  After learning from my time, I tipped the butcher to cut it up for me into 1.5 in pieces.
  • I also only used 6-7 chili peppers (use even less if you don't care for spicy).
  • For the store-bought chili sauce, I used chili pepper soaked in a hot oil that comes in a jar in asian stores.  This is much hotter than Sriracha or other bottled sauces (i.e. Lee Kum Kee).  This was also why I cut back on the fresh chili peppers.  You'll have to customize this to your liking and based on what you can find.
  • I didn't use any oil since I was using a non-stick pot and because there is plenty of fat from the meat.
Modified Instructions:
  • Using a mortar and pestle (or whatever you might have available in the kitchen) combine the ingredients for the chili paste.  I didn't have any issues with just using a bowl and the flat side of a whisk.  I smashed it up just enough to break down the contents some.
  • If you didn't get your pork belly pre-cut, then cut it into 1.5 in pieces.  Toss this in a large pot and add the chili paste you just made, chili sauce, ketchup, soy sauce, turmeric powder and marsala powder.  Mix it up well and stick this in the fridge for 30 mins.
  • Heat the pot at medium heat after you remove it from the fridge.  I tossed (not stirred) it up enough just to keep meat from sticking to the bottom, but was careful not to over do it.  This helped seal the mixture.  Do this for 5 mins, then add just enough water to cover the pork.
  • Let it go to boil, then lower the heat and let it simmer for 1.5 hrs.  Check it constantly to make sure that the liquid doesn't get reduced too quickly within the first 30 mins.  After the first 30 mins, liquid reduction is fine.  In order to get the meat to cook evenly and keep parts of the meat from getting dry (exposed areas), I constantly turned the pieces of meat over (with minimal stirring).
  • Add the last rest of the shallots and garlic and ginger.  Cook for about 20 mins and then add tamarind, sugar, and salt to your liking (personally, I prefer 1-1.5 tsp of tamarind, 1/4 tsp of sugar, and no salt).
  • Cook for another 10 mins or until the meat and skin is tender (the skin should be pulling from the meat).
It seemed a little intimidating when I first looked into the recipes and it requires a lot of "babying",  but it was well worth it!

Pin It Now!