
Coffee Cup Sleeve 2.0 (improved sleeker design)
Coffee Cup Sleeve 2.1 & Fabric Gift Bag
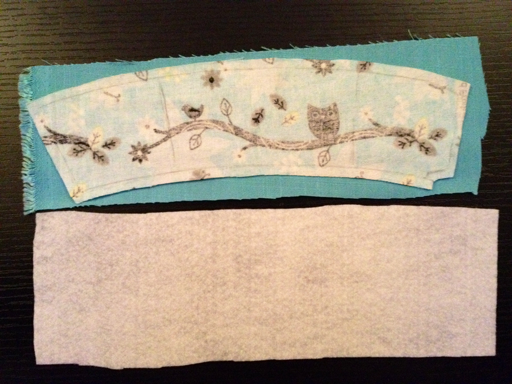
I loves owls and I was so happy when I found such a cute owl flannel remnant at Joann's. I had this exact project in mind when I saw this fabric. Owls, Starbucks, being green... perfect! I had seen it by the bolt and figured I'd check the remnants to see if it was there and it must have been my lucky day! On a side note, I LOVE remnants. I usually only need a small amount of fabric for this and that, so why not get the extra discount for remnants to get the same amount of material I would have gotten anyway?
 |
| It's on the bulky side, but I kind of liked that because of the flannel material. Cozy and cushy. I'll be making a different one with less weight as an alternative sleeve. |
Materials:
- 3.5x11" front fabric
- 3.5x11" back fabric
- 3.5x11" felt, interfacing, batting, or omit if your fabrics are thick
- 2 buttons
- 1 hair elastic
- marking tool
- bobby pin
- a chop stick or similar (for poking corners of the fabric out when turned right side out)
- needle/thread for hand-sewing
Costs:
- front fabric ~ $0.50/yd, Joann
- back fabric ~ $1.25/yd, Joann
- buttons ~ $1/300pk, Joann
- felt ~ $0.50/yd, Joann
Instructions:
I used a sleeve from Starbucks as the template. Be sure to have an idea of image placement if you are using a printed fabric that has a wide image design like mine.

|
 |
|
 |
Now, it's time to close up the sleeve.
|
 |
|