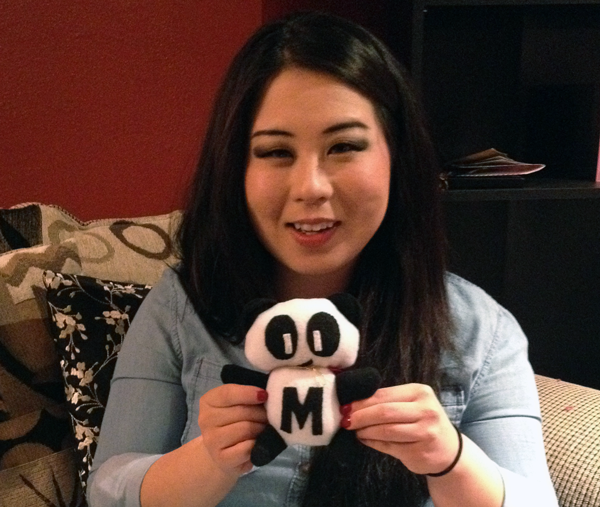
One of my good friends recently had a birthday and I was so excited to make her something. It would have been the second birthday of hers since I started my sewing endeavors. I decided to make her a stuffed panda, because we all associate her with pandas and who doesn't love pandas! I suppose that is why we all love her too :) I designed the panda with simple shapes, so it was fairly easy to do. The template is available here: Panda Pattern. I left the face up to your creativity. Please share what you come up with!
Materials:
- 8x22" white fleece - body
- 8x5" black fleece - limbs, ears
- black and white felt (as needed for your face details and embellishments)
- stuffing
Instructions:
- Cut out all your pieces, including details for the face and any other "embellishments". I added the letter "M" for personalization for my friend's name. I think that is a nice touch, but you can just do a black oval chest as well.
- Sew the face and embellishments by hand on the right side of the fabric. I am not so familiar with hand-sewing techniques, but I think that the stitches I used most represents blanket stitches. My stitches are perpendicular to the edge, where a straight stitch would be parallel. The reason I did it this way was so that the edges would lay flatter.
- Sew the ear pieces together by placing wrong sides together. I wanted the raw edges for the ears, so did not plan do the whole "turn-right-side-out" routine.
- Sew the limb pieces together by placing rights sides together. Turn right side out.
- Stuff the limbs about 2/3 of the way. If you over-stuff, it becomes difficult to sew them to the body later.
- Place the ears along the edge of the panda's face where the ears would go. Then, place the back piece for the head (wrong side up) on top of that. Pin together.
- Sew the layers together and leave a 3" opening at the neck.
- Turn right side out and stuff. Sew the gap close with blind stitches.
- Place a body piece right side up and lay the limbs in position with the openings pointing outwards. As you can see in the picture, I have purposely made the limbs pieces slightly longer so that it would be easier to work with. Also, this why you do not want to stuff the limbs all the way.
- Place the other body piece over the limbs, right side down. Pin and sew the layers together while leaving an opening for the neck.
- Turn right side and stuff away! Blind stitch the opening closed.
- Lastly, attach the head to the body. I don't know what the "best" way to do this is, but this is what I did... Pull the needle through the neck of the body, grab it from the other side, and pull the needle through the neck of the head. Repeat all the way across to secure.
Here's my friend presenting her new gift! As you may have noticed, her panda has a cape. Have some fun and add your own accessories!


